While hunting through boxes recently, I stumbled across my original 1994 vintage Simcity 2000 3.5in floppy disks.

If you were a child or adult with access to a personal computer in the mid 90’s odds are you played Simcity 2000. It was the simulation game that defined the era.

These three disk from 1994 contained the MSDOS version of the game and the Urban Renewal Kit expansion pack that let you modify the game’s buildings, build city’s outside the simulation, and print your city as a multi-page wall hanging. Unfortunately 23 years is a long time for a floppy disk, and it’s unlikely the data on these disk is still readable.
So instead of throwing these disk out, I going to build a display around them to celebrate the hundreds of hours I spent tweaking, perfecting, and burning down simulated urban areas.
I’ve had a fascination with Sim City for years now, and back in 2011 I created the Sim City 2000 Tabletop Playset for my MakerBot Cupcake CNC 3d printer. Modeled in SketchUp, the playset is based on buildings that appeared in the game.

Image from Thingiverse User 3dxgr
My thought is to create a shadow box to display the disks floating over a 3d printed cityscape lit by a rising and setting sun. The finished shadow box can only have a limited depth, about 3 inches, or it won’t be able to hang on a wall. To fit an impressive cityscape into such limited depth, we’re going to use a trick called Forced Perspective. Forced Perspective distorts depths and distances to trick the eye into perceiving more depth than really exist.
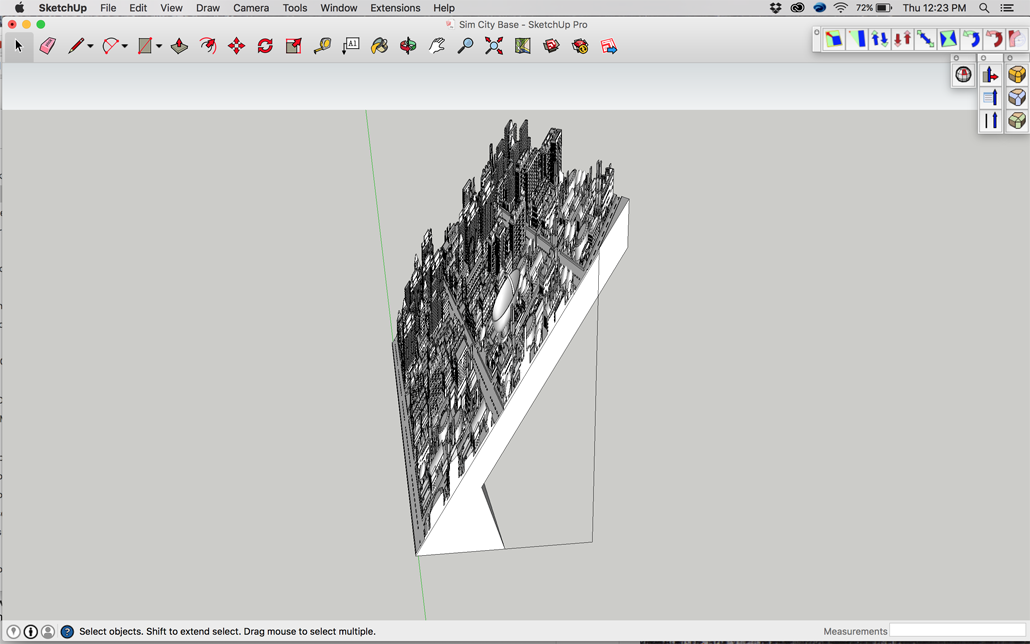
Three transformations have to occur to distort the model’s perspective. First we need to squeeze the back side of the model around its center, making parallel lines converge at a vanishing point. After that we skew the model up along a curve or angle, creating the impression of elevation over the model. Finally we’ll compress the models depth, so the final result will fit in the shadow box. SketchUp’s scale tools aren’t really intended for this, so we’ll to use FredoScale, an excellent plugin available for free download through the SketchUp plugin warehouse.
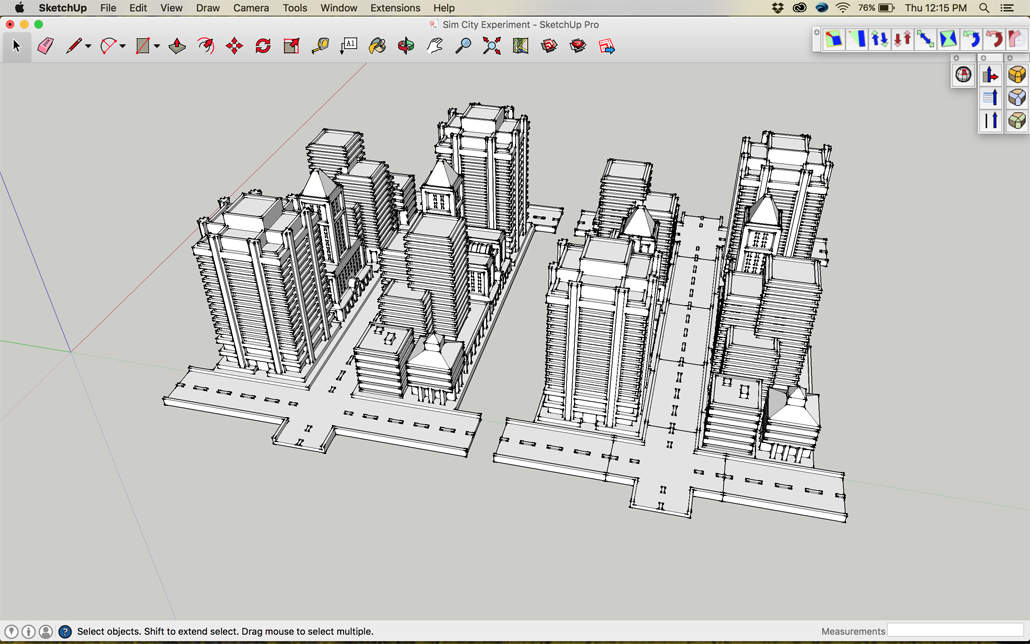
I’ve always wanted to try this with a 3d printed model but haven’t actually done it before. To test the process, I created a small group of buildings and roads and unified them into a single object using the explode command and the Cleanup3 plugin. With Fredo Scale, I pinched in the back side of the model in and then skewed the model up. I used Sketchup’s own scale tools to compress the models depth.
I created two study models, to test different methods of skewing the line of sight. The first skewed the buildings along a curved path, Inception style. The second skewed them along a straight line.


My Ultimaker Extended was out of filament, so these test the models were printed on my trusty old Replicator 2.
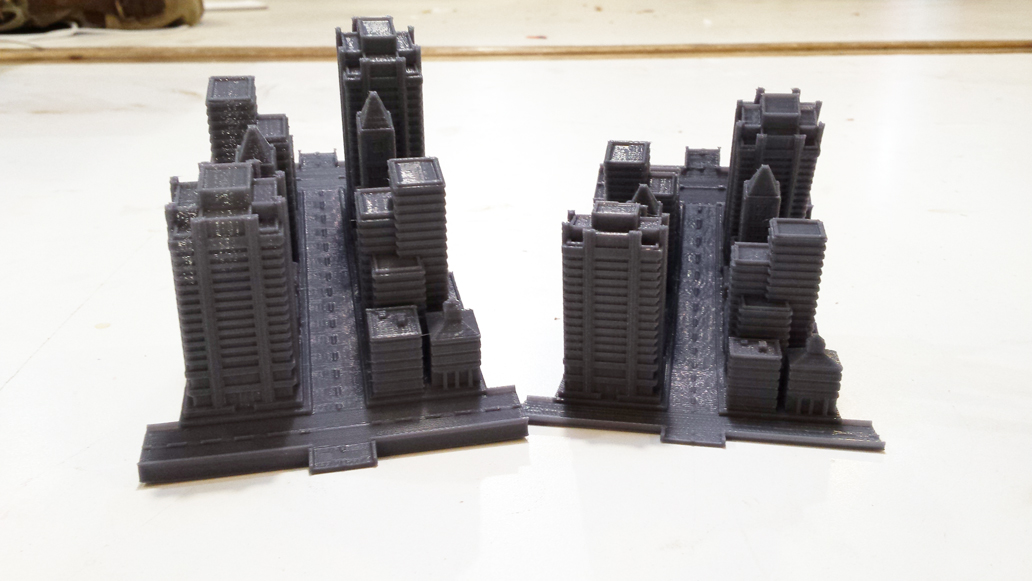

The forced perspective effect works amazingly in both the study models. I decided to use the straight path skew for the final effect, it’s simpler to control and creates a deeper impression of depth.
Creating the full size cityscape was a larger and more time consuming repetition of building the study models. This time I created a much larger area of buildings and roads, unified it into a single model, and distorted it. I pushed the distortion on this model much further than in the test, with some of the buildings becoming only a few millimeters thick.


The city ended up taking 36 hours to print at a 100 micron layer height. And it came out spectacular.

It amazes me how well the effect of the forced perspective holds up. This printed plate is only two and a half inches deep. Because it’s a 3d printed object and not just a flat image, the buildings overlap and occlude properly as you move left and right across it. Hopefully the shadows cast by the neopixel sun will enhance this effect as it moves across the sky.
The box itself is a few pieces of MDF cut to size on the table saw. There is a channel cut into three sides of the box to hold a strip of Neopixels that will create the the moving sun and day/night cycle. Images of clouds on the inside of the box complete the interior.


The Neopixels stip are going to create sunrise, sunsets, and a moving sun that cast shadows over the city’s buildings. Neopixels are addressable leds that can be easily controlled from an arduino compatible microcontroller. If you haven’t played with them, pick some from Adafruit. They are a quick and easy way to create complex lighting effects. These pixels are driven by a 5v Adafruit trinket.
The final element to this build is the title sign. I traced the original Sim City 2000 box art in Adobe Illustrator and imported it to SketchUp as a dwg file. After printing, I primed and painted the sign with acrylic paints.


The trinket, power switch, and capacitor for the neopixels are attached to the inside of the box and hidden behind the cityscape.


The three disks and title sign are attached to the back of the box with standoffs and secured in place by 3M VHB (very high bond) double stick tape.


A sheet of clear acrylic compleats the shadow box and keeps the dust out.
If you would like to build your own Simcity 2000 shadow box, the files are available for download here