This Week we're to look and a 3D Fabrication technology that is a little outside of my wheelhouse. 3D Milling. We'll be using Fusion 360 to generate 3D Toolpaths and carving them from pink insulation foam on my Inventables X-Carve.
I've been watching the SV Seeker Channel on YouTube for several months, and had my interested piqued when Doug Jackson used his CNC machine to carve foam positives of capstan to be cast in brass. We often cast Aluminum here at Hammerspace, and duplicating Doug's project seemed like a great opportunity to expand my fabrication knowledge.
Design
I've been using Autodesk's Fusion 360 for more and more 3D design projects. It runs natively on my Mac without all the hassle of rebooting in Windows to run Solidworks. Fusion 360 also offers integrated CAM toolpath generation that will export G-Code that can run on my X-Carve. I'll this project as a great impetus to learn how to these tools work.
My capstan design is very simple, 70mm in diameter and 50mm tall, and will be made up of two identical halves that I can carve in the X-Carve's limited z-depth. I'll figure out sprues and pouring apertures in the next step.
CAM Toolpaths
Fusion 360's CAM tools are extremely powerful, especially for software that's available commercially for $40 a month and free to non-commercial tinkerers and educators. There are three basic operations we need to do to each side of the foam block. We'll be milling the capsan halves from 80mm x 80mm X 50mm blocks of foam.
Facing
A Facing Operation will remove all of the material from the face of the block down to a specified depth. This quickly gets rid of the excess depth of foam from the block, and creates a true flat surface to start the next operation from. Booth side of the block have a facing operation, but side A removes 20mm of material in three passes, and side B removes 5mm of material in one pass.
Clearing
A Clearing Operation is designed to quickly and roughly remove most of the material that needs to be cut away from the stock. Fusion 360 offers a specialized version of clearing called Adaptive Clearing, Which works to keep as much of the tool surface as possible in contact with the material to speed the operation and extend the cutting tool's life. Both sides of the block have an Adaptive Clearing operation, Side A's cuts away the outside of the block to make the curve of the gripping surface, Side B's cuts away the excess material in the caspstan's center.
Contour
A Contour Toolpath creates the final surface of the part, running the cutting bit over the surface in a tight spiral that removes the rough finish of the clearing path. Both sides have a contour operation, but side B has a second circular cut opertionation to remove the excess material from the final part.
Carving Setup
We'll be carving these parts on my Inventables X-Carve With a 1/8th inch two flute flat end mill. I have previously created a true flat area on my X-Carve by Milling flat a small square of MDF attached to it's hold down board. I'll located the block of foam stock in the center of the flat area by drilling a 1/8th inch hole down the center of the block, and keying it into a matching hole i've drilled into the base board. I've set this hole as Zero of the X-Y for the X-Carve, but the machine's web based Easel software doesn't really have controls to let me be more precise than that.
I'll secure the blocks down with double stick tape, mill side A, the flip and recenter them using a 1/8th inch drill bit to align the hole in the block with the one in the machine's bed.
We'll be importing the G-Code for each operation directly into Easel and running it from there.
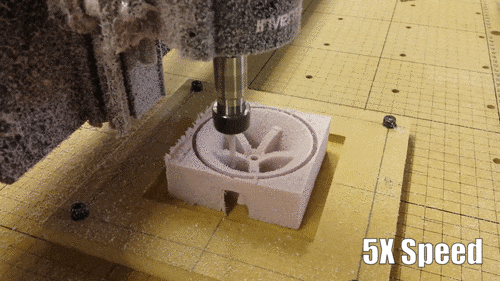
Carving Side A
There are Three operations that make up Side A of each block
Surfacing

Adaptive Clearing

Contour

Carving Side B
Surfacing

Adaptive Clearing

Contour

Circular
Side B has a final Circular cut operation to create the outer surface of the final part.
Conclusions and Results
The final parts came out well, with some light sanding we'll be ready to add some sprews and get started with the process of casting these in aluminum.
Before we cast, I'll 3D Print a few versions of this, so we can have a side by side comparison of the final result from the two different processes.
Thanks for reading everybody, and a big Thank You to Doug Jackson and his SV Seeker Channel for provide the inspiration for this project.
If you like reading our articles, consider supporting us by hopping over the the KC Kit Co Store to buying one of our 3D Printable Kits.