
Every once and awhile you have to do something completely ridiculous, like cast yourself an army of Chocolate Terracotta Warriors…
This model of one of the famous Terracotta Warriors was created by Thingiverse user lolikuma. (download the original file here) It is a faithful reproduction of one of the thousands of Warriors in the famous Terracotta army that protects the tome of Qui Shi Huang, China’s first emperor.
There isn’t any chocolate filament available on the market yet, so to turn the digital file in wonderful edible chocolate we’ll have to follow a three part process. First we’ll print the model in PLA, then create a silicone mold from the printed part. Finally, we’ll pour hot chocolate into the mold and let it cool into the final figure.
I printed the warrior at a 0.1mm layer height on my MakerBot Replicator 2. When printing high resolution objects I prefer to use meshmixer supports, I find they are less likely to leave marks behind on the surface.

3D Printing the Warrior model from Thingiverse.
We’ll create the mold out of a pourable liquid silicone product from Smooth-on that is colloquially known as Dragon Skin. It is a food safe silicone that will stretch and bend to allow demolding, but return to its original strength for reuse. I constructed an enclosure around the warrior with foamboard and hot glue.


The silicon come in two parts that need to be mixed in a 1:1 ratio. We added a little coloring and mixed using a paddle attached to the drill press. Pot life for this silicon is 45 minuses, so we took advantage of the extra time to thoroughly degassed the mixed silicon under a vacuum dome before pouring.


The Dragon Skin needed 10 hours to set, so the next morning we were ready to demold. Removing the outer foam was easy, getting the warrior out was a bit more difficult. The mold stretches to make removal easier, but I still had to cut it in two places. The first cut, down the back provided a place to spread the mold when taking the part out. The second cut is through the chunk of silicon between the statue’s legs.


For this chocolate cast, we're using some ‘candy coating chocolate’ that was Hammerspace kitchen. Real chocolate would have worked better, but it's a bit more complicated to use and we had this on hand. We broke the chocolate coating into chunks and used the microwave melt it inside this giant measuring cup.

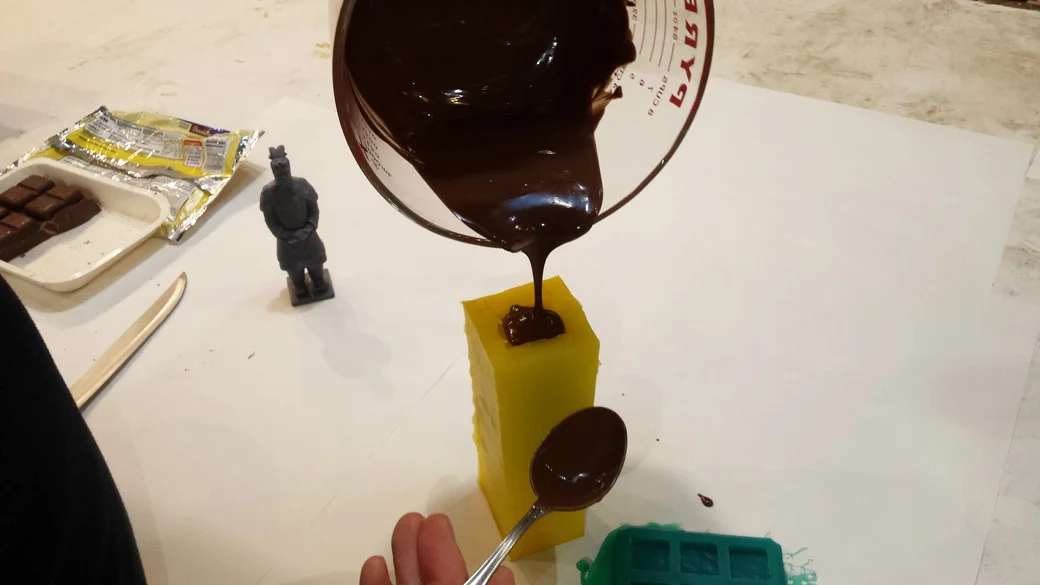
To keep the liquid chocolate from hardening as it is poured, the mold was heated in a 350 degree oven for 10 minutes. The hot mold got a spray of food safe mold release and was ready to go. I poured a thin stream of chocolate so that it would fall all the way to the bottom of the mold and fill it from the bottom to the top. With the leftover chocolate I cast a small set of dungeon builder tiles to use as test pieces and snacks.

The filled mold chilled in the refrigerator for an hour before demolding, which when great until I tore the warrior’s head off. Overall the detail reproduction was amazing! There were almost no bubbles, and the chocolate even picked up even the smallest details.


I repeated the process again, heating the mold and chocolate before recasting. This time I put the filled mold in the freezer for two hours and lengthened the access cut down its back to make unmolding easier. The second casting came out even better than the first, and didn’t lose his head!

If you would like to make your own Chocolate Terracotta Warrior, the 3d model is available for download from lolikuma’s Thingiverse page here: www.thingiverse.com/thing:1028560
Dragon Skin is available from your local Smooth-On distributor, or their web site: www.smooth-on.com/Silicone-Rubber-an/c2_1115_1129/index.html
If you would like to have a 3d Printed Terracotta Warrior 3d of your very own, Use this button to get one custom printed for you through 3D Hubs. (A portion of the of the cost of each print goes back to the original designer)
Todd Blatt was kind enough to point out that dragon skin is not a certified food safe material. In general, most platinum cured silicones are chemically safe, but only certain smooth-on products have been tested and certified for food safety. You can read more about food safe casting products here.