
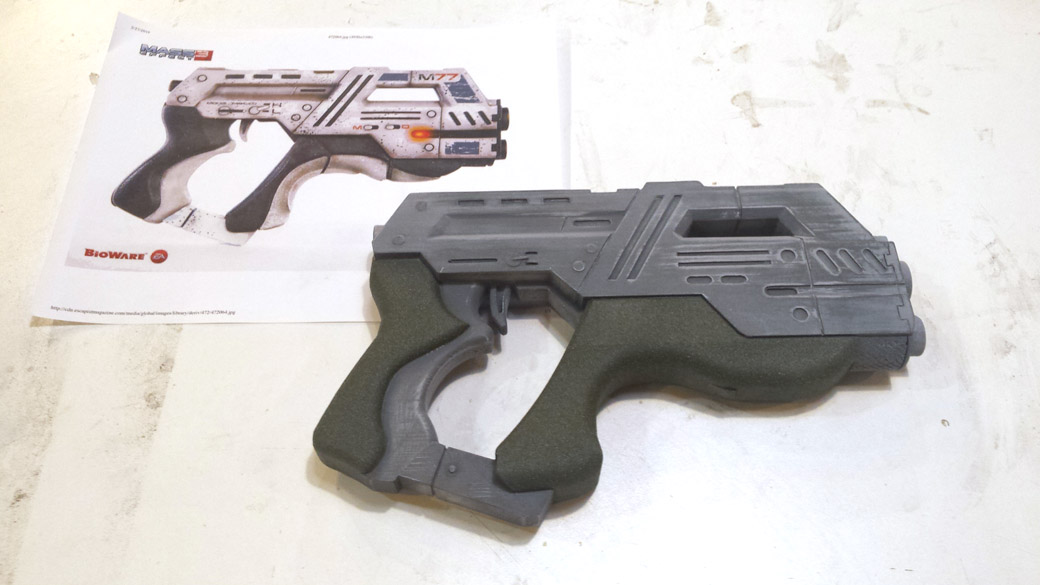
Long ago I printed Jessythemullet’s Mass Effect Pistol from Thingiverse, and it’s been kicking around the Hammerspace workshop ever since. Today, I am finally going to take the time to finish and paint it.
Having never done this before, I relied heavily on the advice and wisdom found in Volpin Props Painting and Weathering guide. I can’t recommend this eBook enough. It is well worth the $8 investment for anyone who want to learning how to paint well.
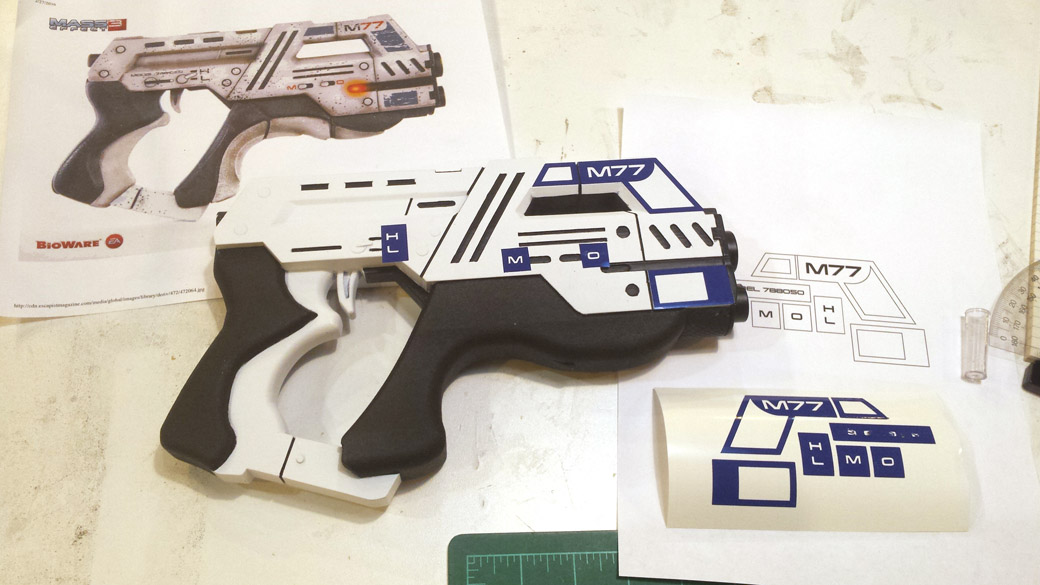
I’ll use this image from the game’s marketing materials as a painting and color guide.

Finishing and Preparation
Unfortunately, all of my pictures of sanding, filling, and finishing the pistol’s surface got lost. So I will cover those steps in my upcoming post about painting of my Saturn V F-1b rocket engine. As a result, this article will primarily cover the steps of Masking, Painting, and Weathering.
Texturing the Grips
After sanding, filling, and priming, The first paint on the model was to create the no-slip texture on the front and rear grips. I masked off the area with Blue painter’s tape, and used two medium coats to build up the texture on the area.


The color of the texture paint really doesn’t matter, It's going to get covered in the next step, but a dark color will be less obvious if upper layers of paint chip.
The Black Base Coat
The next coat of paint is flat black. This is the final color for the grips and muzzle, and will serve as the under color for the rest of the pistol.

Wet Sanding
Between coats of paint, I lightly wet sanded the upper surfaces. This removes any imperfections in the paint and smooths out each layer. Sand very carefully using 1200 grit wet sanding paper, and make sure everything is thoroughly dry before applying the next layer of masking or paint. I found a Hair Dryer useful to speed drying off left over water.

Masking and Painting White
With the wet sanding complete, I masked off the Grips and Muzzle with masking tape and built up multiple light coats of white paint. This is the final color for the pistol’s body and frame, so good coverage and adhesion is key. Make sure to take the masking off within an hour or two of applying paint, Volpin Props’ guide goes into this in more detail.


Painting the Black Details
For the low lying detail in the upper part of the pistol, I masked off the surrounding white with small straight strips of masking tape. Some curved areas had to be masked over, and then carefully cut out with a sharp exacto knife. This was, without a doubt, the single most time consuming step of the entire project. To save time, I used newsprint to complete the masking over the bottom of the pistol, where there was no details being painted.


Surface Details and Markings
I created a drawing of the small surface marking in Adobe Illustrator, and used it to cut a set of self adhesive vinyl stencils with the Hammerspace Vinyl cutter.

With the Vinyl in place, I can mask off different areas and spray on each of the detail colors.
I used a hair dryer to speed up the drying of the paint in these small areas. The detail’s had to be painted one side at a time, but overall it when must faster than I’d expected.


Clear Coat
The next step was to apply a clear coat, which will protect the paint already on the model before we start weathering it. I used a matt clear coat, and then used steel wool to smooth it and remove any remaining shine.


Weathering
The pistol looks awesome. But it is too clean. Too new. This is a space gun. It needs to look like it's got some lightyears on it. Like its been dragged through the muck on countless different worlds and haphazardly cleaned with a uniform sleeve.
To do this, I’m going to use a mixture of acrylic paint and water. In other places i’ve heard this referred to as a ‘wash’, but i’m a little unclear on that term.

I’ll start by mixing Black and Brown Acrylic paint with water, but not thoroughly. I want to see streaks of uneven color across the pistol as it's wiped on.


I applied the light ‘wash’ of paint over the model with a paper towel, taking time to rub it into the low spots and details, then let it partially dry for a few minutes.


After about 15 minutes, with the paint partially dry, I used a paper towel to start cleaning the wash off the high areas, like a space marine indifferently wiping down their weapon. The final result looks pretty grimy...

I won’t clear coat this layer, so the acrylic ‘grime’ will continue to wear as people handle the pistol, giving it a more honestly handled look.

Download the files to 3d print your own copy of Jessythemullet’s original Mass Effect Pistol here.
The vinyl stencils I created to paint the details on the pistol are available for download from Thingiverse here.
Throughout this project, I relied heavily on the advice and wisdom found in Volpin Props Painting and Weathering guide. I can’t recommend this eBook enough.
A Special Thanks to Craig Berscheidt from Built-to-Spec for taking a few moments to pose as a our space marine/hand model for the hero photographs.